Running 32 bit Azure CLI on 64 bit Windows generates a warning:

As for today, there is already a new, 64 bit installer ready to install from the official Microsoft page.
Just uninstall the old, 32 bit version of the app, and install the 64 bit one!
Running 32 bit Azure CLI on 64 bit Windows generates a warning:
As for today, there is already a new, 64 bit installer ready to install from the official Microsoft page.
Just uninstall the old, 32 bit version of the app, and install the 64 bit one!
Goal of this post is to write a short test using Pytest.
Tool/prerequisites we are going to use: Visual Studio Code (or any file editor), python 3+.
GitRepo is available here.
Testing is and will be essential when coding. To make our life easier, developers created many frameworks and helpers to quickly achieve high code coverage. One well know library for Python is Pytest, which we are going to use in this article.
Start a new project/folder using your favorite editor and create a requirements file for PIP, we are going to use test_requirements.txt. Add our only dependency:
pytestInstall our dependency with the following command (running from the folder where the test_requirements.txt is):
pip install -r test_requirements.txtNow we can add our code file with the name basic_calculator.py:
def sum(numberOne: int, numberTwo: int):
    return numberOne + numberTwo
It doesn’t do anything fancy, just sums two number.
Now comes the test. Add a new file called test_basic_calculator.py:
import basic_calculator

class TestHandler:
    def test_sum_one(self):
        sum = basic_calculator.sum(2,3)
        assert sum == 5

    def test_sum_two(self):
        sum = basic_calculator.sum(66,55)
        assert sum == 121
We are done with coding, let’s run our test (give the following command from folder):
python -m pytestThe result should be something similar to this:

What happened here? We asked python to run the module called pytest in the working folder. Pytest then searches for filenames which start with “test_” and looks for classes starting with “Test” containing function names starting with “test”.
Narrowing down the test scope
We might want to run test only on one file, to do so we can specify it by name:
python -m pytest ./test_basic_calculator.pyThere are further options as well
Run only one class in a file:
python -m pytest ./test_basic_calculator.py -k "Test_Handler"or
python -m pytest ./test_basic_calculator.py::Test_HandlerIf you only want to run one test in a class:
python -m pytest ./test_basic_calculator.py -k "Test_Handler and test_sum_one"or
python -m pytest ./test_basic_calculator.py::Test_Handler::test_sum_oneHappy coding!
Goal of this exercise is to show how easy it is to deploy our python code to AWS.
Tools/prerequisites we are going to use: Visual Studio Code, NPM, python 3, AWS account, AWS credentials configured locally.
GitRepo is available here.
Serverless is a great tool to have the production code and required cloud computing configuration next to each other. To install serverless, use the following command in your favorite shell:
Note: you will need “npm” installed
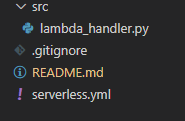
npm install serverless -gCreate your folder structure for the project: we are going to need one python file, which will be the host of called function and add a file called serverless.yml, for configuration.
Let’s start with the python file:
import datetime

def handler(event, context) -> str:
    dt = datetime.datetime.now(datetime.timezone.utc)
    utc_time = dt.replace(tzinfo=datetime.timezone.utc)

    return str(utc_time)
It is a pretty simple code, which will return the UTC time formatted to string. Which we need to note is the two parameters of our function: event and context, both of them will be added by AWS. As in this exercise we don’t care about input parameters, just add them to our function.
Go to the serverless.yml and add these lines:
service: BlogDavidPythonLambdaDeploy

provider:
  name: aws
  region: eu-west-1

functions:
  utc-time-teller:
    name: utc-time-teller
    handler: src/lambda_handler.handler
    memorySize: 128
    timeout: 30
runtime: python3.8service: is the name of the group.
provider: configuration of cloud computing platform.
name: which cloud computing platform we are using.
region: AWS’ regions are available here.
functions: in the use case of AWS, functions are the Lambdas.
“utc-time-teller”: the identifier of our Lambda.
name: how the function will be named on AWS.
handler: path to our function in the form: path/file.functionName
memorySize: how large lambda we are planning to use. Measured in MB-s. Further details and prices can be found here.
timeout: maximum processing time, measured in seconds.
runtime: container type definition with the needed prerequisites like installed python3.8. Further AWS runtimes can be found here.
If we are done with our files, open up a command line tool and call this command:
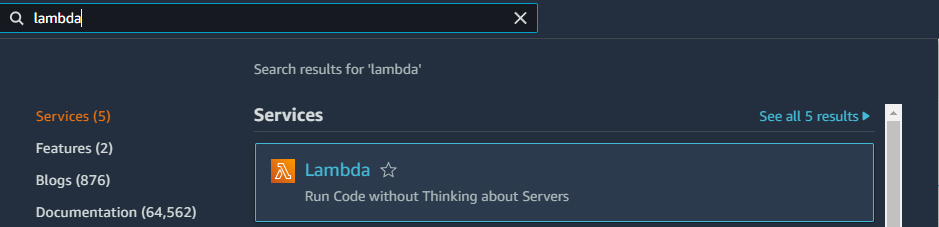
serverless deployServerless will pack our code and create the stack on AWS. After it finishes, go to AWS Console and in the search bar look for “lambda”:
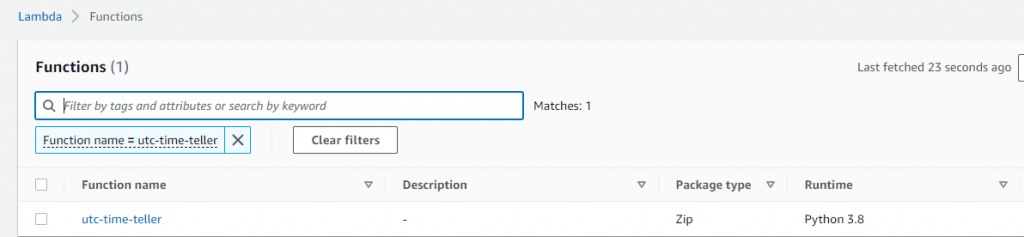
Search for the name of our lambda “utc-time-teller”:
Click on it and navigate to the “Test” tab, then hit the “Test” button:

If everything went alright, we can see the result of our Lambda:

I am quite new to python programming but happy to use it for quick test cases like API calls or file operations. To run these scenarios I run them in different ways:
From file
One of the easiest way to call your script is to store them in a file and make python run them:
print('I am run from a file!')content of run-me.py
Run it from command line:
python run-me.py
From inline command line
If you don’t want to save your code to a file, you can run it from inline:
python -c "print('I am from inline command line')"
From inline command line, multi line
Normally python code is segmented by new lines and indentation, but inline we can separate commands by semicolons:

Imagine the scenario when you have an SQLite database and you need to delete some of it’s content based on conditions, then list the IDs what you just deleted.
Normally it would take at least two queries: first select the ids based on the condition, store them in a list, then delete the rows with the just queried ids and continue to work with them.
SQLite has a “RETURNING” keyword, which can come in handy to reduce the queries run to just one.
For example we can utilize it as following:
DELETE FROM [file] WHERE toDelete == 1 RETURNING nameThe above code will remove the rows marked “toDelete” and return the name-s of those.
Quick example using python 3:
import sqlite3

con = sqlite3.connect('./test.db')
cur = con.cursor()
cur.execute('CREATE TABLE [file] (id, name, toDelete)')
cur.execute('INSERT INTO [file] (id, name, toDelete) VALUES (1, "testFile1", 0)')
cur.execute('INSERT INTO [file] (id, name, toDelete) VALUES (2, "testFile2", 0)')
cur.execute('INSERT INTO [file] (id, name, toDelete) VALUES (3, "testFile3", 1)')
cur.execute('INSERT INTO [file] (id, name, toDelete) VALUES (4, "testFile4", 1)')

print(cur.execute('DELETE FROM [file] WHERE toDelete == 1 RETURNING name').fetchall())

con.commit()
con.close()
It will print the following:
[('testFile3',), ('testFile4',)]