Generally an event subscription looks something like this:
// Creating a timer
System.Timers.Timer t = new(1000);
// Subscribing on it's elapsed event
t.Elapsed += T_Elapsed;
// Starting the timer
t.Start();
// Implementing the timers' elapsed event
void T_Elapsed(object? sender, System.Timers.ElapsedEventArgs e)
{
    Console.WriteLine("Tick!");
}
// Not letting the app to exit
Console.ReadLine();
We have an event emitter, the timer, and we are subscribing and implementing a method when that event is emitted.
It is possible to shorten this event implementation in one line:
// Creating a timer
System.Timers.Timer t = new(1000);
// Subscribing and implementing on it's elasped event
t.Elapsed += (_, _) => { Console.WriteLine("Tick!"); };
// Starting the timer
t.Start();
// Not letting the app to exit
Console.ReadLine();
Note: the (_, _) is equal to (sender, e), we just shorten them because we won’t use them.
Although it can be convenient to use this form regularly, but take care and keep the code readable!
Nowadays for a complex web application it is almost always necessary to write a WebAPI. One way to test these endpoints during and after implementation is to manually create our own http clients, which is time consuming and hard to follow the constant changes, which can occur regularly with a new API. There are many tools for this purpose. Probably one of the most well known is Swagger, which we are going to showcase.
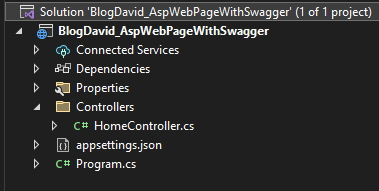
Start a new ASP.NET Empty project. We are adding a new folder named Controllers and a controller named HomeController.cs to it. Our structure should look like this:
Project structure
New we are extending the HomeController with our two endpoints:
[Route("api/home")]
public class HomeController : Controller
{
    [HttpGet]
    [Route("getMessage/{message}")]
    public ActionResult<string> Get(string message)
    {
        return $"Your message from get was {message}";
    }


    [HttpPost]
    [Route("postMessage")]
    public ActionResult<string> Post([FromBody] string message)
    {
        return $"Your message from post was {message}";
    }
}
Our endpoints should be available on these two urls:
Note: at this state the endpoints are not served as we haven’t configured our site to interact with controllers.
Let’s configure our website to serve our endpoints and use Swagger+SwaggerUI. From Nuget we need to add Swashbuckle.AspNetCore.SwaggerGen and Swashbuckle.AspNetCore.SwaggerUI packages. As all of our dependencies are in place we can go to Program.cs and setup these:
var builder = WebApplication.CreateBuilder(args);
// Telling ASP that we want to use the controller feature
builder.Services.AddControllers();
// Adding swagger code generator (and it's dependencies) to the services
builder.Services.AddSwaggerGen();

var app = builder.Build();
// Mapping the endpoints in the controllers to serve them
app.MapControllers();
// Registering swagger middleware
app.UseSwagger();
// Registering the UI service
app.UseSwaggerUI();
// Starting the website
app.Run();
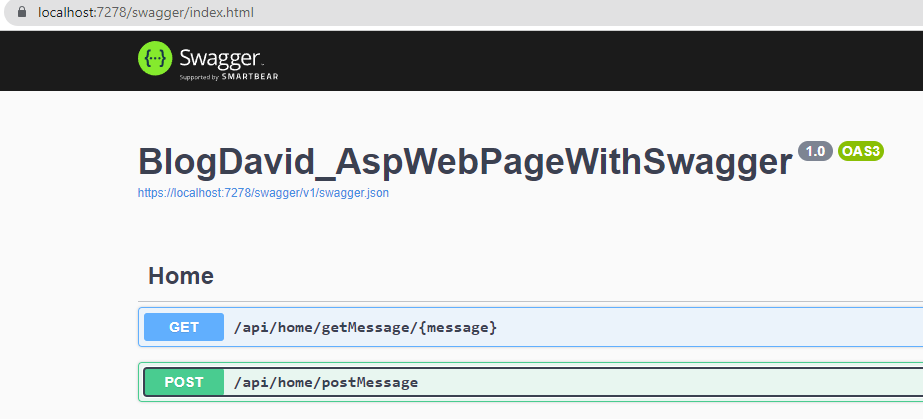
Running our application will fail to load the default page, because we don’t have any. But if we add swagger at the end of our url, the SwaggerUI should appear:
SwaggerUI page
We can click on the endpoint dropdowns and try them out by adding parameters and clicking on the Execute button.
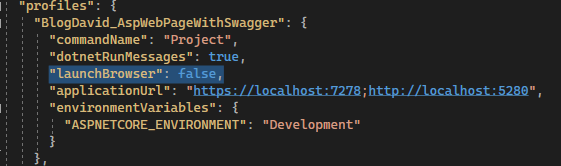
I don’t really like the default mechanism of Visual Studio, that it starts a new browser instance every time we start our website. It is quite easy to solve this problem. Look for the launchSettings.json under Properties folder. Search for the profile you are starting and set the launchBrowser to false. Thats all!
AWS S3 is a versatile product, used for many different purposes from logs to big data storages. It’s basic operations are easy to implement using the AWS SDK.
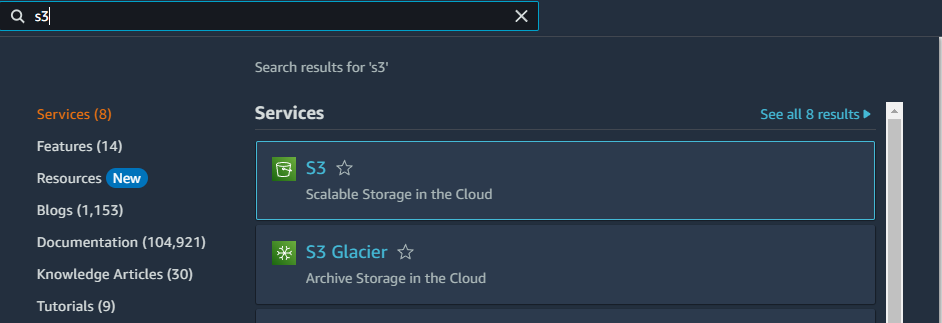
For the first step we need to create an S3 bucket which will hold our files. Go to AWS console, search for S3 product in the search bar:
Search for S3 in the AWS search bar
Click on Create bucket button:
Create bucket button
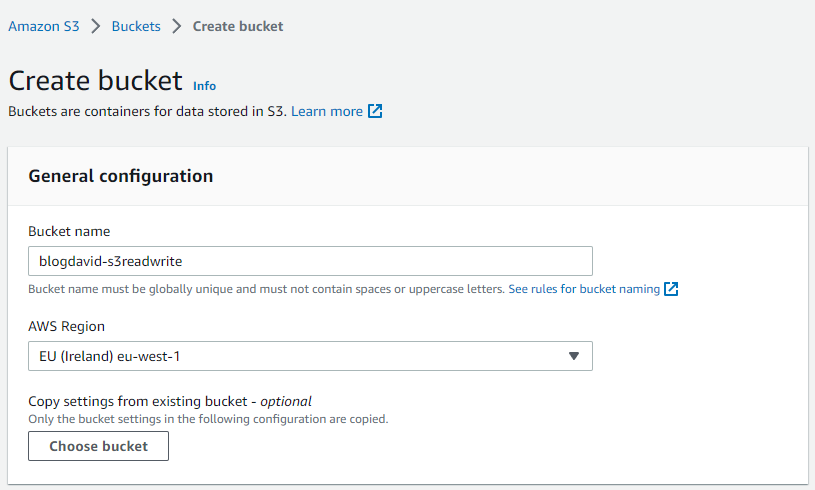
Choose a name and region, then hit Create bucket at the bottom of the page:
Creating the bucket
Now we are all set on the AWS console, we are going to use it later on for testing.
We can get back to our code editor and add AWSSDK.S3 to our project, which has bunch of S3 related codes to help us out. Let’s write some code:
using Amazon.S3;
using Amazon.S3.Model;
using System.Text;
namespace BlogDavid_S3ReadWrite
{
internal class Program
{
// Note: Running the program will use the local machine's credentials!
// Store the bucket's name somewhere
const string s3BucketName = "blogdavid-s3readwrite";
// Set the client to our bucket's region
static IAmazonS3 s3Client = new AmazonS3Client(Amazon.RegionEndpoint.EUWest1);
static async Task Main(string[] args)
{
// Generating a random path for our text file
string randomizedPath = $"{Guid.NewGuid()}/{Guid.NewGuid()}/{Guid.NewGuid()}.txt";
// Adding some text to save
string textToSave = $"I am a text generated at {DateTime.UtcNow}";
// Converting the text into bytes
byte[] textAsBytes = Encoding.UTF8.GetBytes(textToSave);
using (MemoryStream ms = new MemoryStream(textAsBytes))
{
// Rewinding the stream
ms.Position = 0;
PutObjectRequest putRequest = new PutObjectRequest
{
// Name of the bucket
BucketName = s3BucketName,
// Key as the path under the bucket
Key = randomizedPath,
// Data we are saving
InputStream = ms,
};
await s3Client.PutObjectAsync(putRequest);
}
// Let's read back the previous file
// Construction the request object
GetObjectRequest getRequest = new GetObjectRequest
{
BucketName = s3BucketName,
Key = randomizedPath
};
// Sening the request
using (var getResponse = await s3Client.GetObjectAsync(getRequest))
using (var sr = new StreamReader(getResponse.ResponseStream))
{
// Reading back the response
var getResponseString = await sr.ReadToEndAsync();
// Showing the response, which is hopefully the text we just saved
Console.WriteLine(getResponseString);
}
Console.ReadKey();
}
}
}
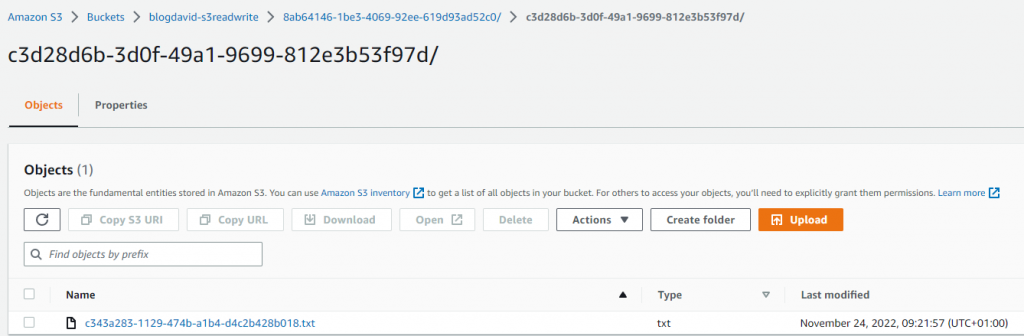
Starting our app, it should write and read a file on S3:
Calling another process and capturing it’s output is really straightforward in .NET. We just need to create a new ProcessStartInfo with the needed parameters and pass it to the Process.Start method. That is all.
Here we have a solution with two projects. The first project is receiving two parameters and writes out a number in a loop, then the second project is depending on the first one, calls it and captures it’s output.
“Counter” project’s code:
public class Program
{
public static void Main(string[] args)
{
int start = Convert.ToInt32(args[0]);
int end = Convert.ToInt32(args[1]);
for (int current = start; current < end; current++)
{
Console.WriteLine(current);
}
}
}
Note: there is no safeguarding on the parameters, as it is just an example project.
“Caller” project’s code:
using System.Diagnostics;
var proc = Process.Start(new ProcessStartInfo
{
// Arguments to pass to another process, separated by a space
Arguments = "10 20",
// Name of the exe file. Note: it will be copied by the builder (Visual Studio) to the projects bin folder, as it is dependent on the project "BlodDavid_CounterProject"
FileName = "BlodDavid_CounterProject.exe",
// To redirect the output stream, we need to set it to false
UseShellExecute = false,
// We want to capture the data written to the output of the other process
RedirectStandardOutput = true,
// We don't want to show the users another windows, just the output in our main app
CreateNoWindow = true
});
// Starting the another process
proc.Start();
// Listening to the output stream
while (!proc.StandardOutput.EndOfStream)
{
Console.WriteLine($"Message from the other process: {proc.StandardOutput.ReadLine()}");
}
// Don't let our program to exit until the other process finishes
proc.WaitForExit();
// Notifying our user that the other project ended
Console.WriteLine("To exit press enter!");
Console.ReadLine();
ASP .NET MVC is mainly used to serve dynamically generated content, but it is perfectly capable to send html files to the client. To achieve this we only need to turn on two functions in our Startup.cs, Configure method:
// Let Asp Mvc default '/' to index.html
app.UseDefaultFiles();
// Tell Asp Mvc to serve files from under wwwroot folder
app.UseStaticFiles();
That is all. From now on, the content in wwwroot will be served.
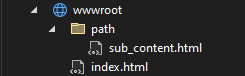
Note: Files path will be without the wwwroot! Eg.:
Project’s wwwroot file structure
The files above will be available on the following path:
With C# it is pretty straightforward to create, write and read text files:
using System;
using System.IO;
namespace BlogDavid_FileCreateWriteRead
{
internal class Program
{
static void Main(string[] args)
{
// Keep info of file in memory
var fileInfo = new FileInfo("./a.txt");
// Create the file, then create a stream writer, which is easily used to add text
using (var fileStream = fileInfo.Create())
using (var streamWriter = new StreamWriter(fileStream))
{
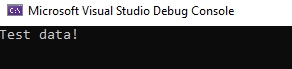
streamWriter.WriteLine("Test data!");
}
// StreamReader is a great tool to read text from file
using (var streamReader = new StreamReader(fileInfo.FullName))
{
Console.WriteLine(streamReader.ReadToEnd());
}
// Don't let console to close, wait for one char
Console.ReadKey();
}
}
}
Note: this post is heavily based on this StackOverflow answer.
Zipping files in .NET core is pretty simple and can be done in memory:
public static void ZipMultipleFiles(IEnumerable<FileInfo> files, string zipPath)
{
using (var archiveStream = new MemoryStream())
{
using (var archive = new ZipArchive(archiveStream, ZipArchiveMode.Create, true))
{
// iterating through files, if doesn't exists, skip that file
foreach (var file in files)
{
if (!file.Exists)
continue;
// creating place for the file in the zip
var zipArchiveEntry = archive.CreateEntry(file.Name, CompressionLevel.Fastest);
using (var zipStream = zipArchiveEntry.Open())
using (var fileStream = new FileStream(file.FullName, FileMode.Open, FileAccess.Read, FileShare.ReadWrite))
// copying the file's content into the zip
fileStream.CopyTo(zipStream);
}
}
// stream needs to be seeked back to the beginning
archiveStream.Seek(0, SeekOrigin.Begin);
// writing the whole zip to a new file
var zipFile = new FileInfo(zipPath);
using (var fileStream = zipFile.Create())
archiveStream.CopyTo(fileStream);
}
}
When you create a new project, starting with C# version 6, you will see the following Program.cs:
// See https://aka.ms/new-console-template for more information
Console.WriteLine("Hello, World!");
It could be scary for some people: no static Main entrypoint, no namespace, no usings. Actually the above template, as mentioned on the commented url above, is translated to this:
using System;
namespace BlogMainTemplate
{
internal class Program
{
    static void Main(string[] args)
    {
        Console.WriteLine("Hello World!");
    }
}
}
If you like the old template more, you can just copy it to your Program.cs without any issues.