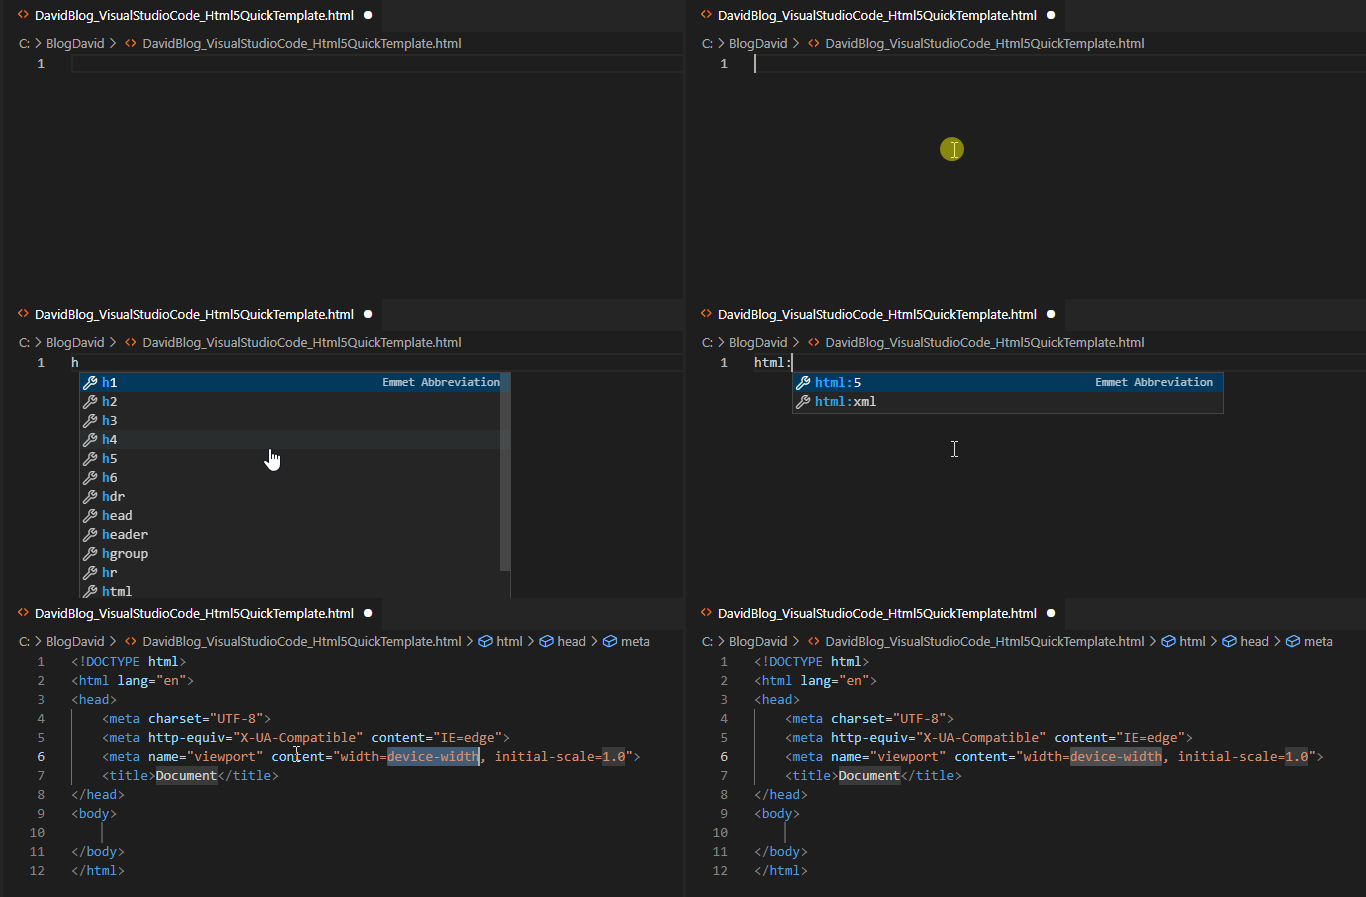
Visual Studio Code is a pretty convenient code editor which comes with many awesome features. One of those is the in-built html5 template, which can be accessed real quick:
Just type in html:5 and hit the tab:

Visual Studio Code is a pretty convenient code editor which comes with many awesome features. One of those is the in-built html5 template, which can be accessed real quick:
Just type in html:5 and hit the tab:

Goal of this post is to write a short test using Pytest.
Tool/prerequisites we are going to use: Visual Studio Code (or any file editor), python 3+.
GitRepo is available here.
Testing is and will be essential when coding. To make our life easier, developers created many frameworks and helpers to quickly achieve high code coverage. One well know library for Python is Pytest, which we are going to use in this article.
Start a new project/folder using your favorite editor and create a requirements file for PIP, we are going to use test_requirements.txt. Add our only dependency:
pytestInstall our dependency with the following command (running from the folder where the test_requirements.txt is):
pip install -r test_requirements.txtNow we can add our code file with the name basic_calculator.py:
def sum(numberOne: int, numberTwo: int):
    return numberOne + numberTwo
It doesn’t do anything fancy, just sums two number.
Now comes the test. Add a new file called test_basic_calculator.py:
import basic_calculator

class TestHandler:
    def test_sum_one(self):
        sum = basic_calculator.sum(2,3)
        assert sum == 5

    def test_sum_two(self):
        sum = basic_calculator.sum(66,55)
        assert sum == 121
We are done with coding, let’s run our test (give the following command from folder):
python -m pytestThe result should be something similar to this:

What happened here? We asked python to run the module called pytest in the working folder. Pytest then searches for filenames which start with “test_” and looks for classes starting with “Test” containing function names starting with “test”.
Narrowing down the test scope
We might want to run test only on one file, to do so we can specify it by name:
python -m pytest ./test_basic_calculator.pyThere are further options as well
Run only one class in a file:
python -m pytest ./test_basic_calculator.py -k "Test_Handler"or
python -m pytest ./test_basic_calculator.py::Test_HandlerIf you only want to run one test in a class:
python -m pytest ./test_basic_calculator.py -k "Test_Handler and test_sum_one"or
python -m pytest ./test_basic_calculator.py::Test_Handler::test_sum_oneHappy coding!
Goal of this exercise is to put our previously developed python function behind a REST API.
Tools/prerequisites we are going to use: Visual Studio Code, NPM, python 3, AWS account, AWS credentials configured locally.
GitRepo is available here.
Api Gateways are important infrastructure elements, as a simple Lambda function is only available from inside AWS ecosystem. REST Api is a common, easy to implement standard to share resource.
To make our Lambda function publicly available we are going to update our previous code base with two things: tell the serverless to create the Api Gateway for our stack and upgrade the response of our utc-time-teller.
Let’s start with the python code changes. As we are going to communicate on HTTP channel JSON is a good model structure to respond with. Edit our handler’s code as following:
import datetime
import json

def handler(event, context) -> str:
    dt = datetime.datetime.now(datetime.timezone.utc)
    utc_time = dt.replace(tzinfo=datetime.timezone.utc)

    return {
        "statusCode": 200,
        "headers": {
            "Content-Type": "application/json"
        },
        "body": json.dumps({
            "utc ": str(utc_time)
        })
    }
We are returning a default HTTP response with statusCode of 200 (everything is OK), telling the receiver that the message is in JSON format (“Content-Type”: “application/json”) and of course adding the body itself.
The Lambda is still testable using the previously shown method:

We can continue with the serverless.yml:
Add these few lines to the end of our function:
    events:
      - http:
          path: /{proxy+}
          method: any
      - http:
          path: /
          method: any
This will generate the API Gateway on AWS. The whole serverless.yml looks like this:
service: BlogDavidPythonLambdaDeploy

provider:
  name: aws
  region: eu-west-1

functions:
  utc-time-teller:
    name: utc-time-teller
    handler: src/lambda_handler.handler
    memorySize: 128
    timeout: 30
    runtime: python3.8
    events:
      - http:
          path: /{proxy+}
          method: any
      - http:
          path: /
          method: any
Now call our deployment script from a command line tool:
serverless deployServerless CLI should add new lines to the logs under the category “endpoints”. Copy the one without {proxy+} ending to the browser and enjoy our newly created API gateway response:

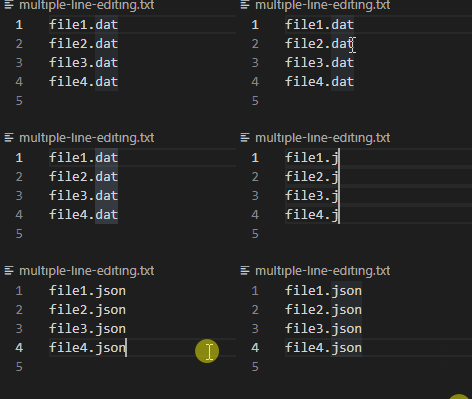
You have a file with multiple lines and you want to edit the same character place in every line simultaneously.
Imagine your file has file names as rows and you want to edit their extensions from dat to json:
file1.dat
file2.dat
file3.dat
file4.dat
In Visual Studio Code go to the first line, place the cursor between the dot and ‘d’, then hit CTRL+SHIFT+ALT all together and keep them down. Using the downward arrow move the cursor down on all the lines. When all lines are having the same cursor, edit the rows as you wish:

Note: some other editors need only SHIFT+ALT (without CTRL) to edit multiple lines